
This is a LONG overdue post but better late than never?! Renovating the kitchen was my number one priority with the new house but when we priced it out it was quickly axed. There are always surprises when you buy a house and our biggest surprise was that our house was filthy – like seriously gross. The previous owner was a smoker and had a dog and we’re pretty sure she never deep cleaned a thing.
We scoured everything but the kitchen always looked dirty to me and it drove me crazy. With Instagram, Pinterest and HGTV, kitchens are such a big deal and caved to societal standards. In January I decided we’d update the kitchen but with a budget in mind. Since the process was done so slowly, I don’t know how much we spent exactly but I can assure you it was done at the cheapest cost. Here’s the breakdown of the updates, scroll to the end for before pictures.
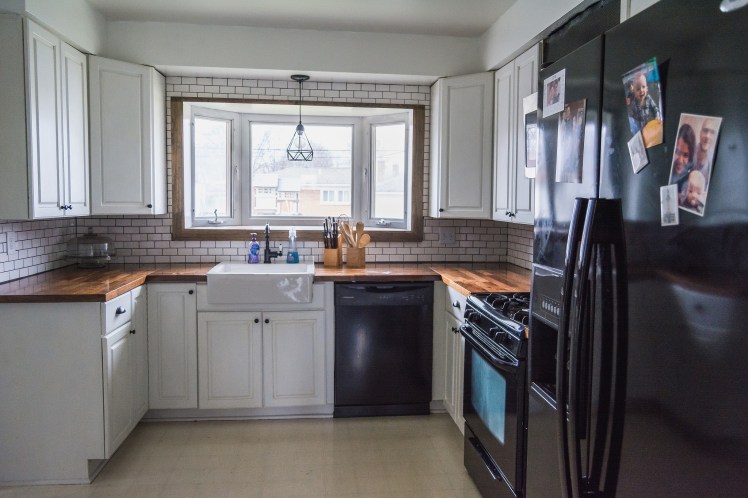
Counters: Ofcourse I dreamed of stone but that was out of the question (our combined updates didn’t total the cost of stone countertops). We moved ahead with updated laminate but I kid you not, the Home Depot contractor refused to service our house. Fortunately, it turned out to be a blessing in disguise. I was so fed up with the stress I told Danny we were just going to put a slab of wood on the countertops until we saved for stone. When I was daydreaming in IKEA I noticed they had solid wood countertop for under $200 that were self-install. We went for it and I could not be happier! I think it looks much better than stone. I would highly recommend it but it does appear they raised their price a little, we used two of the largest slabs.
Sink: I LOVE our sink! Everyone dreams of farmhouse sinks these days and they are so expensive – except this one. This beautiful sink is $186! The faucet costs nearly as much ($119)! We’ve had it for a year and I still want to hug it. Danny installed it on his own because he’s super handy!
Light: We replaces the lights immediately and I can’t find the exact model but it was from Menards and this similar design is $20.
Cabinets: I spent MONTHS painting the cabinets. Each door was a 10 step process. It was a pain but worth it. I used the Rust-Oleum white ($80), I skipped the ‘aging’ step because I wanted a clean look. I ended up needing two kits because it’s a lot of white paint. The knobs and handles are from IKEA. We added cabinets to one part of the kitchen and got the basic assembled cabinets. I also painted the entire kitchen white to keep it light and airy.
Backsplash: Let me say again that Danny is super handy (and the best husband ever), he took out the old and put up the beautiful tile ALL BY HIMSELF! I found the subway tile sheets at Home Depot, in our local store and I can’t find them online for a link (but it wasn’t expensive). I was insistent on black grout and even though he didn’t like the idea he did it (and fortunately, he liked the results). It’s gorgeous and makes the space between counter and cabinet seem much bigger than before.
Window: The windows in the house were LITERALLY falling out the walls and had to be replaced. However, the quote for this garden window and our bay window was the same as getting all the other windows! That was impossible for us to afford so we kept them (and keep our fingers crossed that they last forever). They were hideous beige and Mr. B had the brilliant idea to paint them. I had the brilliant idea to get new molding around the window so the space feels far more open than it did before.
Microwave: Our kitchen isn’t big (our entire house is less than 1200 sq ft) and having a microwave take up counterspace was a no-go for me. Installing it above the oven was HARD WORK that Danny and I did together. We had to remove a cabinet and I covered the empty space with a painted grate. We put a piece of white wood below the microwave to cover up the janky wood beams holding it up.
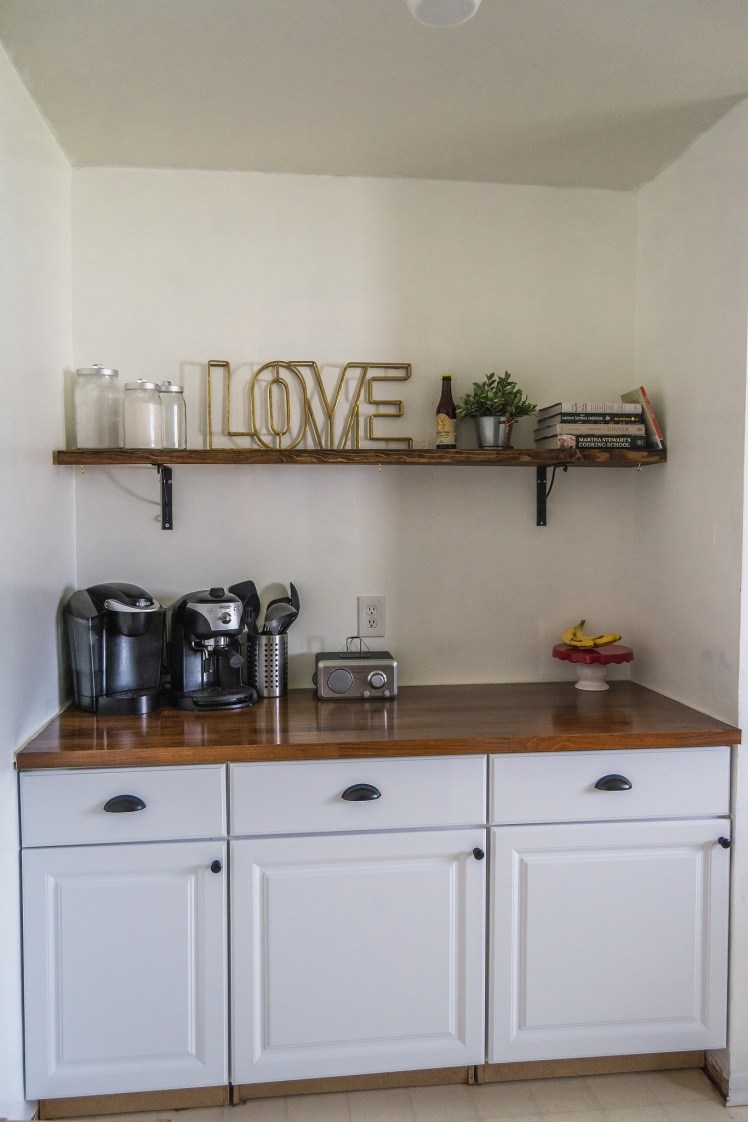
Coffee bar: Originally this was an eat in kitchen but I don’t need an eat in kitchen – I need a cooking kitchen. We added the extra counter space and covered up a built-in square shelf to put a floating shelf. The brackets are $4 at IKEA and the artificial plant is $5.
There are things to touch up but I’m so happy with the results I don’t even care about when the little stuff will be done.


Before: The day we moved in, I honestly don’t remember it looking like this at all. I didn’t even take a picture of the empty space where we added cabinets.


Thank you, Carrie, for this. Redoing my kitchen is on my priority list, and money is an issue. I have a drop ceiling that I want to take down, but I had recently decided just to pain the cabinets and get new pulls, plus maybe a new floor. My cabinets look exactly like your old ones, so your “after” pictures give me so much hope!
LikeLike
Set a good play list for painting, it’s not hard at all but time consuming. The nice thing about the time was that since we did a little at the time I was constantly finding new motivation to keep going. It’s definitely worth it. 🙂
LikeLike